When Digital Darkrooms Started Making Sense, ca. 1999
Note (2009): This article was first published in 2001. Any discussion of digital darkroom technology will soon be outdated. But this article serves to remind us of what standards we choose, and how we select equipment around achieving those standards. For example, many photographers now desire a scanner only to provide web images, because those who still use film are traditionalists and many of them make their fine prints using a traditional darkroom. In the comparisons in this article, the film scanner was clearly better for making prints of any reasonable size (8x10 or larger). But when sized for web display, both scanners do well enough.
In 2009, the tests below could be conducted afresh using a film scanner for 35mm and, say, an Epson V700 for larger formats. The results would be uniformly better that what is shown here. And it is possible to fully explore the law of diminishing returns--right up to making scans on a drum scanner and prints on a laser enlarger or large-format ink printer. But the modern digital darkroom fits less easily into a kilobuck than it did in 2001, because such equipment is now targeted to the motivated few still using film rather than the mass market that now captures images digitally in the first place. So, printers are cheaper and better, but scanners are dwindling. The Acer scanners listed below are no longer available, unfortunately. The Epson flatbed scanners that include usable transparency adapters for scanning film are much better than the Acer, but are also more expensive. Film scanners are even more rare if one wants to buy new.
For the record, I now own and use an Epson V750 for scanning large format film, and a Nikon 8000ED for scanning small and medium-format films. (I no longer use 35mm film--that format for me has been replaced by digital--but I still have thousands of old slides and films that I keep thinking I will one day revisit). These scanners are good enough (at the very least) to make excellent 16x20 prints, and the printer I'm now using is an Epson 3800. Every aspect of the above equipment exceeds anything possible in 2001, especially for a thousand bucks.
Note that both of the scanners below and many lower-price scanners of the last 10 years use a USB interface, and both can be operated using Vuescan, which is currently available software, without any intervening drivers. Thus, while it's not so easy to build a thousand-dollar digital darkroom with current new equipment, it is still possible to buy used equipment. Some older scanners, however, require a SCSI interface. I once owned a Minolta Multi II scanner that required that hardware. SCSI interfaces are still available, and Vuescan will run a SCSI scanner just fine, but it limits the options on the computer end considerably. Other scanners require a Firewire interface, including my current Nikon film scanner. Those are (at present) still pretty easy to get.
Here's the original article:
How Good Can a $1000 Digital Darkroom Be?
The answer depends on how big you want your prints to be. The printer in this darkroom is an Epson 1270, which has become the standard by which all photo printers are measured, and the first photo printer to offer prints that rival and in some ways surpass conventional color prints both visually and archivally. This printer opens the door to the digital darkroom. The 1270 will make up to 13x19" prints.
I don't test the printer here, because, hey, you can't see the results. But it has been tested in numerous places, and discussed endlessly on dozens of Internet forums and sites. Some praise it as the first great printer to allow artistic expression by photographers, and others point out problems they have with environmental attack on their prints. About the latter subject: Frame the prints behind glass or store them in an album, use the Epson Matte Heavyweight paper, and don't worry about it. Even if you don't take these preventive measures, you probably won't have problems depending on what's being spewed into the air in your locale. (2009 Note: None of the prints I made with the 1270 have shown any signs of degradation. It doesn't matter, though. The newer Epson printers based on pigmented inks are even more durable, though the arguments over that durability still linger on.)
But I do test the scanners. First, let me describe them.
Acer 1240UT
Acer has long produced surprisingly inexpensive peripherals that work surprisingly well considering their cost. I have an Acer CD/RW drive on my computer that was two-thirds the cost of the competition and easier to use. It has worked reliably for me, so I was favorably disposed to their scanners.
The 1240UT is a low-cost flat-bed scanner. It scans at 1200 pixels per inch, nominally, and includes a 5"x7" transparency adapter that allows you to scan anything from 35mm slides to large-format negatives. That's a lot of scanner for $150, if it works as stated.
At 1200 pixels per inch, it should be able to produce an 11-inch square print from a square medium-format negative or transparency at the maximum capability of the printer. Here's the arithmetic: 2.20" (56mm picture size on the film) X 1200 pixels per inch = 2640 pixels along one side of the image. 2640 total pixels / 240 pixels per inch of print (which is optimal for the Epson 1270) = 11 inches. You can make larger prints, but only by using a lower resolution in the printout (which still produces good prints). I have enlarged portions of picture to double that size with usable, though not optimal, results. One can also print at higher resolutions, but with less potentially visible improvement.
But flatbed scanners may not produce the full resolution represented by their specifications, because of the flexibility and slop in the machinery, and because each pixel is not optimally focused. That's the issue I explore here.
Acer Scanwit 2720s
As opposed to the 1240UT, the Scanwit is a film scanner. The light source and the sensors are fixed, and the film is moved past them during the scan. This allows greater physical precision and improved focus.
The nominal resolution is also much greater, at 2700 pixels per inch. The only real downside to the Scanwit is the same downside shared by most inexpensive film scanners: It only scans 35mm and smaller films. Medium format won't fit.
The short side of a 35mm frame, scanned at 2700 pixels per inch will give you, coincidentally, about 2640 pixels. So the maximum theoretically optimal print from a 35mm film image is 11 x 16.5".
The Scanwit has been fully tested by several reporters on the Internet, and I'm mostly using it as a standard against which to measure the 1240ut.
Depth
Another issue is dynamic range. Both the Scanwit and the 1240UT have a published dynamic density range of 3.2, and 36-bit color depth which can be written to 48-bit files and edited in Photoshop. This is clearly enough for negative materials, but might be challenged by perfectly exposed wide-range transparencies.
Maximum Resolution
Okay, so here's the test. The first is a test of the maximum absolute resolution of the Scanwit. The resolving power of optical equipment is measured in lines/mm. This is different than pixels per inch. If we attempt to photograph a series of closely spaced lines, then the closest lines that we can theoretically resolve are two pixels apart. This gives you a black pixel (on the line), next to a white pixel (between the lines), next to a black pixel (on the next line). So, the theoretical maximum resolving power of a scanner is the resolution/2, plus unit conversions. Here's the arithmetic for the Scanwit: (2700 pixels/inch) X (1 inch/25.4 mm) X (1 line/2 pixels) = 53 lines/mm.
In the real world, lens faults, film faults, photographer faults, and scanner faults will all add up to blur the lines, which will cause the black pixels to be dark gray and the whit pixels to be light gray. But if you can see the difference in two lines with a pixel in between, then you have 50 lines/mm resolution in practical terms. So, can we see that?
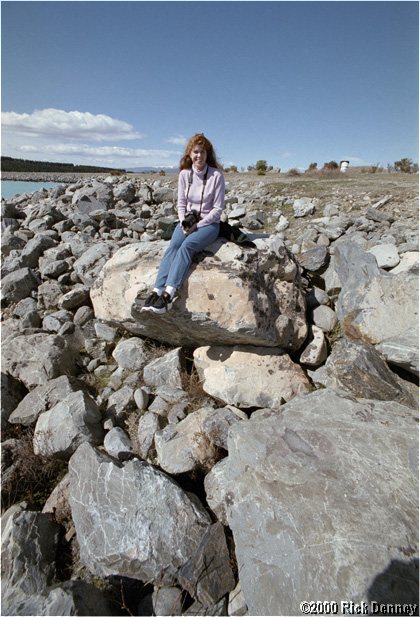
This photo was made in New Zealand, and is shown as scanned with no extra manipulation, but down-sampled to minimize file size. Notice that the red-haired Santa is holding a camera. The picture was shot with Kodak Gold 200, using a Sigma 14mm wide-angle lens on a Canon EOS Elan IIe, hand-held at f/11 and 1/500 second exposure. In the full resolution image, the label on this camera is visible. Here's the 2700-pixel/inch excerpt:
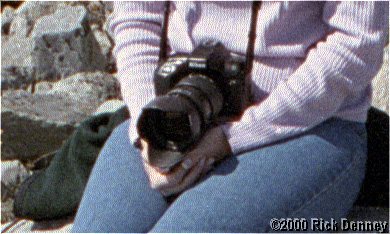
Notice that you can read the "Nikon" label on the camera. The whole label is about four pixels high, or about 0.04 mm on the negative. In fact, with enlargement, you can distinguish the dot on the "i" from the body of the letter. Yup, that space is one pixel wide, indicating that the lens, photographer, film, and scanner worked together well enough to produce 50 lines/mm resolution.
This ain't no formal test with a test target, but it tells me that, in practical terms, the scanner will not significantly degrade 35mm images made with good lenses. The best lenses do better than 50 lines/mm, of course, but this is (barely, perhaps) good enough for 10x15 prints.
Two Scanners Compared
On the day I got the two Acer scanners up and running for the first time, I conducted some quick tests. The picture is an old Kodachrome slide shot about 7 or 8 years ago in the Utah back country near Moab, of a pothole in the slickrock where some dirt and flora has collected (and fauna, too--the cryptogamic soil). The slide has been collecting dust (literally) on my desk for almost that whole period, so the image has almost as much dirt on the slide as there is in the desert scene. The shot was taken with a low-cost Samyang 18-28 zoom lens (set at 18) on a Canon F-1. The lens isn't that bad, but it's no L-series Canon FD lens. Exposure was probably pretty close to Sunny 16 (maybe f/11 at 1/125 on Kodachrome 64).
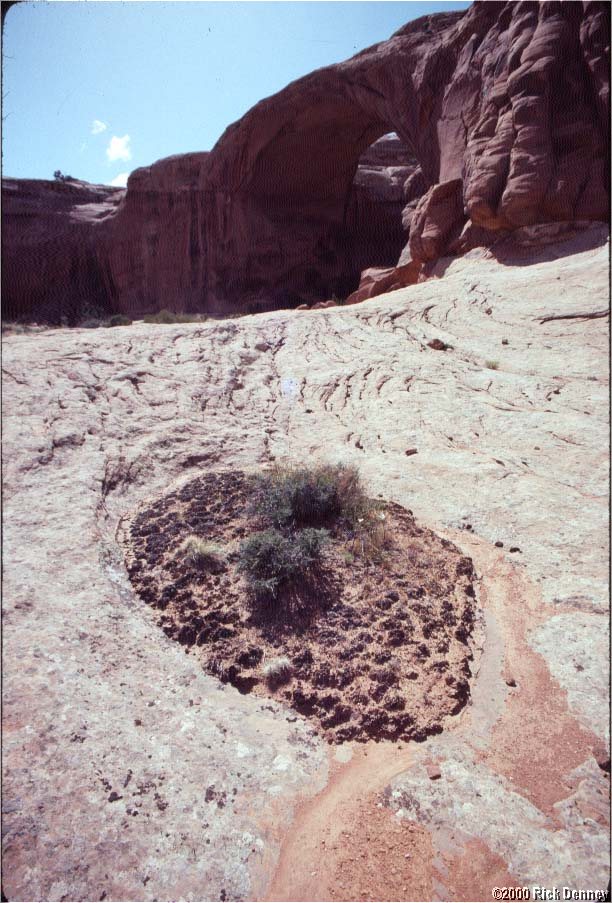
This is the image of the whole slide to give some context. This is a down-sampling from the output of film scanner. The shot is hard to work with, and defies good printing on Cibachrome. The contrast is huge in this midday shot, but both scanners read into the shadows without problem. No attempt was made to improve the appearance of this slide--all these scans show the tonality produced by the scanner. There was no black on the slide that scanned as dark as the slide frame, so both scanners had the range to cover the material in this image. All scans were gathered at 36 bits per pixel, and resampled to 24 bits later within Photoshop. I used Vuescan with the film scanner because it provided much better scans than the Acer software. Vuescan is a commercial, non-Twain scanner control program that supports most of the scanners on the market, and often with better results than the factory-supplied software.
The comparisons include high resolution scans of just a small area in the center of the picture. The picture isn't all that sharp, but you'll still see the differences. Output from the scanner included samples at 2700 dpi, 1350 dpi, and 675 dpi. The flatbed scanner output was sampled at 1200 dpi and 600 dpi.
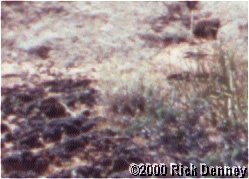
This is the full-resolution Scanwit output, at 2700 pixels/inch. Assuming your screen is typical at about 90 pixels/inch, the full image at the above resolution would be about 30 inches wide and 45 inches tall. This is a lot of enlargement!

Here, we have the Scanwit on the left, at 1375 pixels/inch, and the 1240UT on the right, at 1200 pixels/inch. The resolution is close enough to compare these side by side, and the film scanner is clearly better. At 90 pixels/inch on your screen, the image on the left is part of a 15" by 22" full frame.
![]()
![]()
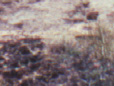
Same image area, but this time scanned at 675 pixels/inch in the Scanwit on the left, and 600 pixels/inch on the 1240UT on the right. Once again, if you saw the whole picture on your screen at this resolution, it would be about 8" by 11". Again, the film scanner is clearly superior.
But we already knew that film scanners are better. So, let's compare the results in a different way. This time, I'll scale the images so that they all appear approximately the same size. The scaling was done either by doubling or quadrupling the size, so that one pixel is a two-pixel square when doubled and a four-pixel square when quadrupled. This should minimize aliasing.
1
2
3


4, 5
Now, back up. No, farther. Back up from your screen so far that you can't see the squareness of the pixels in the bottom two scans. For me, that's about six feet. That's about the same as viewing an 8x10 print from a foot and a half, which is probably pretty close to the distance from which you are looking at your screen. When I do that, scans 1 and 2 look about the same. And scans 3 and 5 are clearly not as good as the ones to their left. So, film scanners (1, 2, and 4) are still clearly better than flatbed scanners.
Now, let's do one trick.

Up close, it's not much better, but back up 6 feet again, and it turns out to be pretty good. Still not as good as the film scanner, but pretty good.
On the other hand, let me do the backing up for you.
Nope, it's still not quite as good, but the gap is narrowing.
The trick is unsharp masking, and all digital darkroom work will use it--a lot. Using unsharp masking, I've been able to produce excellent 8x10 prints from medium-format negatives using the Acer 1240UT. Viewed with a loupe, they are not quite as highly resolved as a conventional print. But from anything like proper viewing distance (which for me is any distance using the naked eye), the digital print seems sharper than the conventional print, because the contrast and clarity is much better. But I can't put that on the web, you you'll have to prove that for yourself.
The bottom line: The digital darkroom is here even for the budget-minded, and it can only get better.